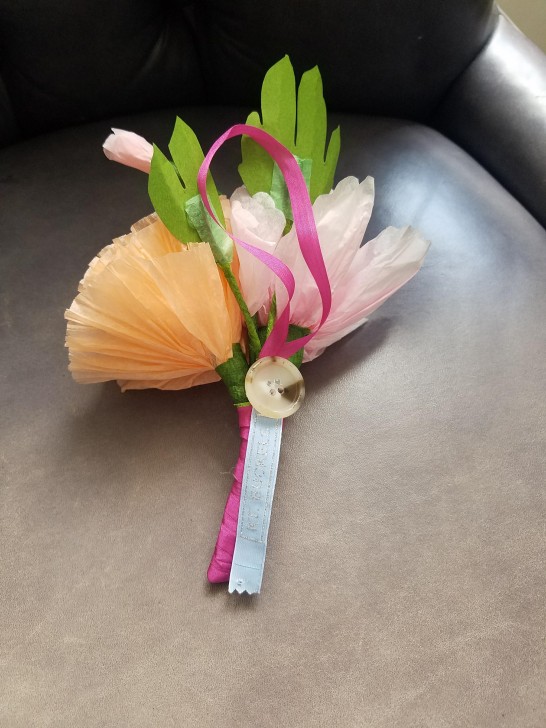
Pretty Paper Petit Bouquet

I was lucky enough to take a paper flower making workshop with this amazing woman Livia Cetti, through The Good Lodge.  I also, happen to be,  lucky enough to know the women who created The Good Lodge. (I’m very lucky) They organize talks, workshops, and events that fill your cup.  I always leave their presence feeling inspired and ready to walk forward.  AMAZING WOMEN!
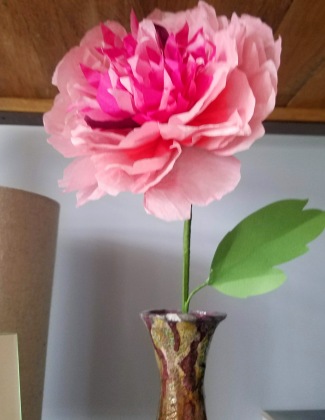
20180603_0928371
My first attempt at a paper flower.

After the class I bought one of Livia’s books.  The Exquisite Book of Paper Flowers. The next morning I woke-up itching to get my hands on some tissue paper and floral tape. I could kick myself because Livia was selling kits, beautiful hand-dyed paper and everything you would need to get started and I only bought the book. Dumb! You can buy her kits here.

I ordered what I needed on Amazon, the book gives you a list of materials and tools you need along with resources for the projects in the book.

And by the time my supplies arrived I also had a reason to make something. Having a reason was just the “bee in my bonnet” I needed to get me going.

Another AMAZING WOMAN I know was celebrating her 50th birthday and I really wanted to make her something special.   Amy, my birthday friend, has one of the most beautiful Christmas trees filled with handmade ornaments.  I’m not saying my piece will be worthy for her tree but I wanted to make her something beautiful and heartfelt that could be hung from a tree, or door knob or what have you, with Amy in mind.

Here it goes.

The Green card stock was mine. The tissue paper was from Amazon. The paper wasn’t of as high quality as the hand dyed tissue paper Livia had at the workshop. And when I tried to dye the paper I wanted to use, only one took, the pale pink.  The dark purple did nothing.  The floral tape was also from Amazon. Get good tape. Because some don’t stick and also slip and slide mine was not good.  The wire was from the Michael’s Craft Store, average.

After you have cut and dyed your paper and created your petals, my petals consisted of two petals folded and pinched together,  and prepare your wires,  by wrapping the wire with floral tape.  You start to build your flower from the bud up, adding each petal one at time. In the workshop I zipped through this wrapping of the wire part, but again, sub quality material made the process a lot slower.  The floral tape I was using kept slipping and separating. Ugh!

But I finished in 3 days. Whoop! Whoop!


I decided to use the same silk ribbon I wrapped the bouquet with as a loop to hang on the tree.  I attached it with hot glue and a vintage button from my collection. Yes I have jars and jars of buttons.  Also, that blue tag says K.T. Buckels, so she never forgets who gave it to her. I’m bold.  I hope she likes it.

Cheers to Amy!  And all the AMAZING WOMEN I know. You fill my cup daily.  I feel very lucky.

Lemons into Lemonade or just more lemons?

Before yesterday, I haven’t even thought about Mod Podge (the link is for my husband who wasn’t familiar with Mod Podge) since the seventies, when my sister and her friends would make collages with magazine pictures for each other.  The truth is I was too little to play with Mod Podge back then, so yesterday was my first attempt.

Let me begin by saying that in my mind this craft project looked much cuter. But I did learn a few things that I think you would find helpful if you were to take on this challenge.

Materials I used:

Scissors, tissue paper, glass vase, Mod Podge (gloss), small paint brush, and Christmas tree lights.

Check out http://blog.craftzine.com/archive/2011/02/how-to_stained_glass_votive_ho.html for the “how to’s”.

Materials I wish I had and why:

All of the above, plus:

Diamond drill bit, decorative paper hole punchers and/or a paper trimmer.

It is possible to drill a hole in the bottom of the vase for the cord. If you order a diamond drill bit from the above company they will even send you directions on how to do it. And it would look nicer, but because that seemed messy and time-consuming I figured I’d just let the cord hang out the top.  I really wanted the vase to look like a collage of butterflies but not even I can tell they are butterflies and I made them. So, if you want a really crisp pattern, I would use a decorative paper hole punch. I’m sure Martha Stewart sells them. She probably invented them. And if I had a paper trimmer I might have tried to make another one in a plaid pattern with some flowers peeking out here and there.

But, it was fun and a great project for kids, so I think I’ll hold on to those vases a little longer. Sorry honey.

Hugs-Katie

P.S. My latest obsession in my next post and why it’s time to move on.

The Inspiration for my first post.

I was on my way to Pilates this morning when I saw this.

Yes it is March 15, and yes this is a Christmas tree waiting for pick-up. Not only are there no more wood chippers coming around to pick-up holiday greenery, but this still had the lights and tree stand on it. My first thought was, “What a jack-off. Really, really Mr. I’m-to-lazy-too-take-my-lights-or-my-tree-stand-off. Look at me I’m so rich I can buy a new set of lights and tree stand every year. Woohoo!” Okay, that last part I just made up, but still, nothing like irresponsible consumption.

As I was continuing my walk up Joralemon St. I started to feel bad about those lights. What could I do with those lights? I decided that if they were still there on my way back I would grab them.

They were and I did. No easy task because the Mr. I’m-to-lazy-too-take-my-lights-or-my-tree-stand-off had them wrapped up and down and all around. There is a method to stringing lights. I googled “how to string christmas tree lights” and there were at least 3 videos on YouTube. No excuses!

After 10 minutes and some words of encouragement from a stranger, I managed to get both strings of lights.

Here’s the plan:

I’m going to make a light for my daughter’s room using a glass vase (from my collection of vases saved from every arrangement my husband has ever sent me, much to his angst), some mod podge, and tissue paper.

First, because I’m paranoid of bedbugs or any kind of bug really, I toss the lights in a trash bag, tie the opening and toss it in the freezer over-night.

Stay tuned to see the finished project.

Hugs-Katie